
Feb 10
2015
2015
Running bare-metal code on an imgtec ci20 MIPS-based board
Update: This project has grown quite a lot and is now a whole series of posts on developing code for the CI20 from the ground up.
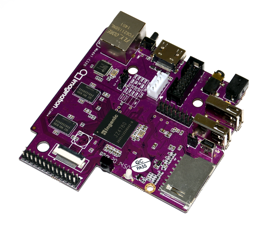
The MIPS32 CI20 board from Imagination is a cheapish dual-core MIPS processor with a bunch of fun extra stuff on it. This post shows you how to start running your own code on the board without an operating system — no Linux, no nothing. We’ll use it to blink a LED really fast :), but this approach is how you would start writing a new operating system for the board, if you were so inclined.
This is part one of a two-part tutorial — part 2 is here (and also linked below).
This post shows you a setup for a Mac. It is marginally easier to do this from Linux (and the Mac-specific parts are made obvious), and marginally harder to do it from Windows (and I have no idea how — something something cygwin).
We’ll connect the board to a serial terminal, set up a MIPS toolchain (compiler and associated programs), write the smallest possible (almost) program which does something useful, and then boot it from the board. In part 1, we’ll get the hardware and toolchain set up, and in part 2 we’ll write code and boot it.
Ready?
You will need:
- A ci20 creator board
- A usb-to-serial connector, such as these FT232RL boards from ebay. Note that your USB to serial must support, and must be set to, 3.3 volts. Often they support both 5 volts and 3.3 volts, and can be switched from one to the other with a jumper or a small switch.
- A few cables to connect the usb-to-serial to the board. You’ll need 3. I used ones like these.
Some handy web pages to refer to when going through this tutorial:
Step 0: Beware of static
Static electricity can destroy things. Be careful when working around the board, particularly in low relative humidity situations (such as winter). Either ensure you periodically ground yourself (the common UK advice is to touch a water pipe), or get an antistatic wrist strap.
Step 1: Serial
First we want to be able to talk to uboot, which is the board’s bootloader. Uboot communicates over uart4, which is described in the hardware page as “Dedicated UART header”.
You’ll need to connect the TXD, RXD, and GND pins to your usb-to-serial connector. On my FTDI-based connector, these connect directly — TXD to TX, RXD to RX, and GND to GND. If you are using something else as your usb-to-serial (such as an Arduino), you may need to switch the TXD and RXD cables.
Once you have connected your wires, plug the usb-to-serial cable in. This will create a device node. On the mac, for an FTDI-based board, this will show up as /dev/tty.usbserial-XXXXXXXX, where the Xs change for different boards.
I used GNU Screen as a serial terminal. From a terminal, type
$ screen /dev/tty.usbserial-A900K06B 115200
… remembering to use the correct Xs, of course, and power up your CI20.
If all goes well, after a few seconds, you should see the CI20 load uboot. After another few seconds, you will see it load Linux. Eventually, you will get a terminal prompt and can log in (l/p ci20/ci20).
So now you have a “headless” ci20 setup, but that’s not so interesting, so shut the board down:
$ sudo halt
… and disconnect the power to the board (you can keep the usb-serial connected if you like). We’ll come back to it when we have something for it to run.
If you’re using GNU Screen, you can get back to a terminal by pressing ctrl-A k, that is, holding ctrl, pressing A, releasing both keys, and then pressing k. It will ask if you’re sure. You are. :) First stage complete!
Step 2: Toolchain
Things get a bit tedious in this step. You’re going to compile gcc and friends for MIPS. On a Mac, this involves creating a case-sensitive disk image, using crosstool-ng to compile everything, and then installing and setting up a PATH. (On Linux, it’s the same process, but you don’t have to create a disk image).
(Update 2017: Doing this on a Mac has become significantly more tedious. The Homebrew version of crosstool-ng is broken, currently, and I also found that I needed a case-sensitive filesystem as the install target as well as for building. Actually, the compiler works just fine without being installed in a case-sensitive filesystem, so I ended up tricking crosstool-ng by mounting a case-sensitive filesystem over the target directory, building, then unmounting and copying the files. Unfortunately these new steps take the process from “tedious but doable” to “advanced”. Perhaps the solution is to switch to Clang.)
So, for the Macs: open Disk Utility and create a new disk image of at least a few GB. Make sure the image type is set to “Case sensitive”.
Mount the new image and cd to it, eg:
$ cd /Volumes/ct
Now install Crosstool-NG. On a Mac, I recommend using homebrew:
$ brew install crosstool-ng
Now we’re going to create the MIPS compilers. Start by setting up a big-endian MIPS template:
$ ct-ng mips-unknown-elf
Now modify it:
$ ct-ng menuconfig
We’re going to make two changes:
- In “Paths and misc options”, set “Prefix directory” to something sane. I picked /usr/local/mipsel-unknown-elf. If you do this, make sure you have write access to /usr/local/.
- In “Target options”, set “Endianness” to “Little endian” as that’s the endianness of the ci20 board.
Now select “Exit” (arrow right) until you return to your prompt. You can now build:
$ ct-ng build
This will take a long time, but will, eventually, hopefully, complete without error. When this happens cd out of your case-sensitive disk image and unmount it. You won’t need it again and can throw it away if you like.
Now, add the tools to your path. The path you want to add is “bin/“ after whatever you set as “Prefix directory” above. So in my case, I added the following to my ~/.bash_profile:
export PATH=$PATH:/usr/local/mipsel-unknown-elf/bin
Close and re-open your terminal if you changed your .bashrc, then test out your new compiler:
$ mipsel-unknown-elf-gcc
mipsel-unknown-elf-gcc: fatal error: no input files
compilation terminated.
$
If you see GCC complaining in the above way, you now have a toolchain! The hard part is over.